
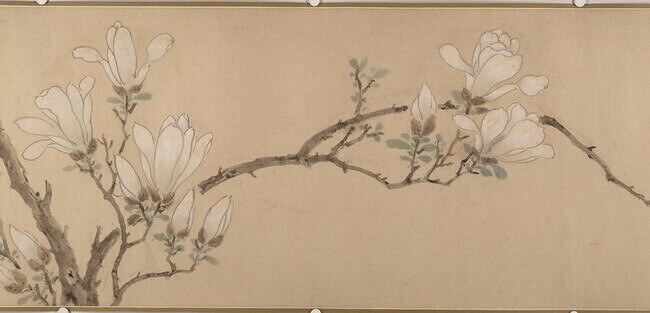
The plant world has inspired artists in all eras of art history, as evidenced by the botanical studies of Leonardo da Vinci, for example. Individually or as part of still life composition, the large, simple yet beautiful magnolia flowers can be an excellent subject for a drawing. With my step-by-step tutorial, I want to help anyone interested in how to draw them.
You can draw magnolia flowers realistcally in three steps:
1. Sketch the outer boundaries of the flowers. Draw the simplified, rough outlines with light lines.
2. Make a line drowing by outlining the larger shapes within the defined borders, then move on to the smaller details. As you progress through the work, refine the shapes of the elements.
3. Use various pencil hatching techniques to depict the effects of light and shadow on the elements of the flowers. By tonal rendering, you can make your drawing realistic with a three-dimensional effect.
It is best to start drawing flowers by observing them and analyzing their structure and shapes. Observe the flowers and make multiple sketches to get familiar with their construction and shapes.
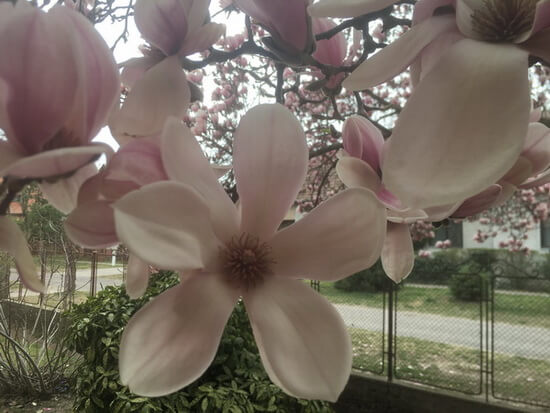
Also observe the effects of light and shadow, which may vary depending on the position of the light source.
The flowers of magnolia are short-lived, but I recommend that you draw them from nature, not from a photo. For beginning artists, the best attitude is to draw a composition of just a few flowers for a start, not to complicate the first drawings too much.
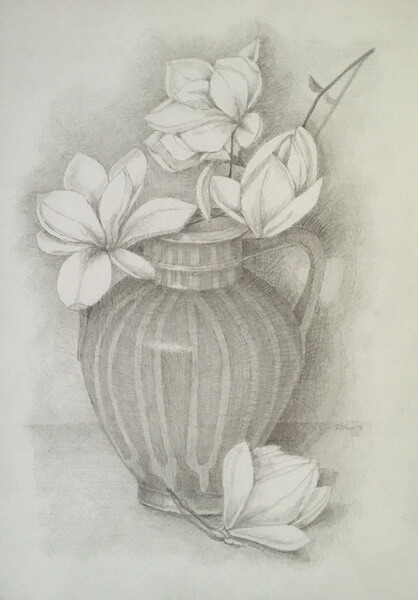
Due to their large size, you can draw magnolia flowers individually, but you can also incorporate them into a still life composition. Plants represent a static part of the living world, which simplifies our work. You may also wish to read my step-by-step tutorial on how to draw trees.
Observe the magnolia flowers
The best way to learn how to draw magnolia flowers and other plants is to do studies by observing them in nature.
Leonardo da Vinci did the same, observing plants and making botanical study drawings. He was interested in the structure of plants. He also dealt extensively with the effects of light and shadow, which he wrote about in his notes.
One of the characteristics of magnolia is that there are no leaves on the tree at the time of blooming, they only appear later after the flowers have withered.
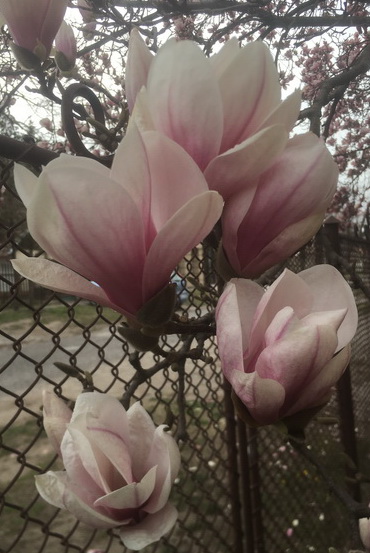
The magnolia flower is cup-shaped. Its petals are oval, with a pointed tip and a vein running lengthwise through them. There are 6-12 petals arranged around a stamen in two rows. The buds of magnolia are ovoid. The bark of the magnolia tree is a shiny grey.
Tools for drawing
Pencils
I recommend graphite pencils with a hardness of 2H to 6B for drawing. Pencils H are harder and therefore we can draw lighter lines with them, and pencils marked B result in softer and darker lines.
With a little practice, just one softer graphite pencil, such as 2B or 3B, may be sufficient to draw and shade an entire drawing.
Pencil sharpener
Sharpen your pencil often, always keep a sharp pointed tip. You can sharpen your pencil with a pencil sharpener, scalpel, or knife and refine the tip with fine sandpaper.
Eraser
The use of putty rubber, (kneaded eraser) is best for erasing graphite as it does not damage the surface of the paper as much as a simple rubber eraser. Another good thing about putty rubber is that it leaves no residue.
Drawing paper
You don’t need the highest quality paper to make sketches, but you can also get a little more expensive, thicker paper to make more serious works of art. The quality of the drawing surface contributes to the quality of our work. The structure and granulation of the paper will also affect the finished product.
Drawing board
Attach the paper to the drawing board using masking tape or clips. Hold the drawing board almost vertically, slightly tilted.
An easel can be useful to support a drawing board if you like to work while standing. If you like to draw while sitting, you can use the back of a chair to support the drawing board. The most convenient way for me to draw in a sitting position is to use an art bench.
How to draw realistic magnolia flowers in three steps
1. Make the line drawing
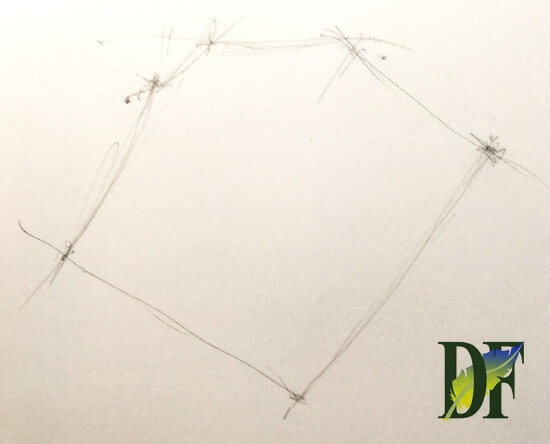
When drawing magnolia flowers, first define the boundaries and outer lines of the composition with light lines. This applies to all types of drawing compositions and objects.
In the next step, sketch the larger shapes before you get into the details. Measure proportions and angles with your pencil.
For all drawings, the proper technique is to move from larger shapes to smaller ones. Don’t start a drawing with the details, leave them last.
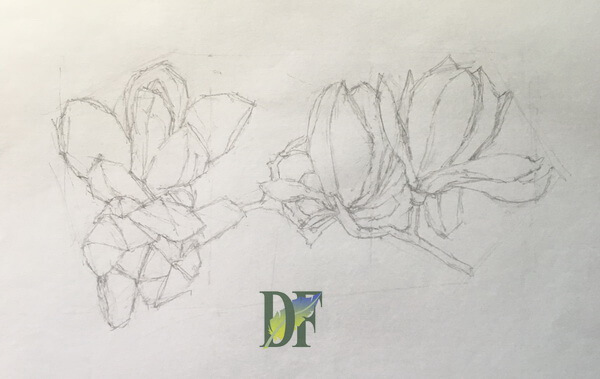
Draw the outlines of the elements of the magnolia flower as well as the outlines of the shadows. As you progress with your drawing, refine the details.
You can delete construction lines if you no longer need them, but they can also remain incorporated as part of the finished drawing, especially if it is a study.
2. Observe light and shadow
Shadows are always on the side of objects facing away from light. There are two types of shadows. One is the cast shadow that the object casts on its surroundings, and the other is the form shadow that appears on the object itself.
The highlight appears in the brightest part of the subject that is directly illuminated, and the darkest is always the cast shadow.
The white or pale pink petals of magnolia are slightly translucent in bright sunlight, so there will be no dark shadows and strong contrasts between the tonal values. On the petals of magnolia flowers, we see no straight lines, hard edges, and sharp angles. Therefore, it is best to create subtle gradations and transitions between the darker and lighter parts of the tonal rendering.
As the light conditions change, so do the shadows, so it is best for novice artists to choose lighting from a single light source.
3. Tonal rendering for a realistic effect
A drawing is a representation of three-dimensional objects on a two-dimensional drawing sheet. One of the best techniques you can use to make your drawings realistic is tonal rendering. In our drawings, we can achieve the effect of spatiality and avoid flat-looking artwork through tonal rendering.
By tonal rendering, you can also realistically present the texture of different objects, in this case, the petals and branches of a magnolia.
The flowers of magnolia are white or pale pink, so you probably won’t need to use very dark tonal values.
You can make pencil hatching in one or more layers. You can draw our lines horizontally, vertically, or diagonally. By changing the pencil pressure, you can achieve pencil marks of different strengths.

During tonal rendering, it is best to follow the shape and contours of the object so that you can represent the shape of the object as faithfully as possible.

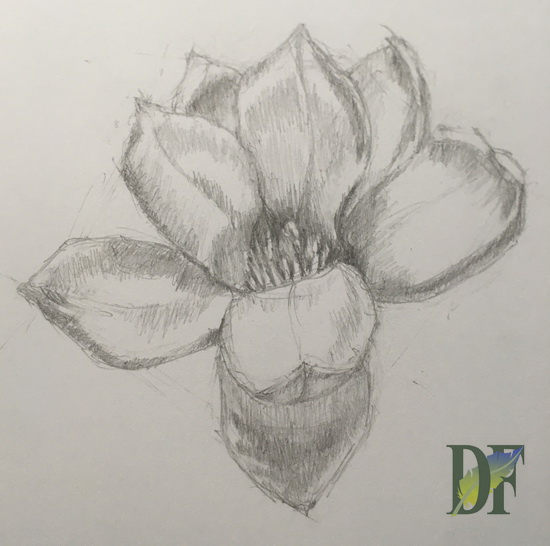
The right way to do tonal rendering is to gradually develop the entire drawing at the same time.
With pencil hatching applied in several layers and different directions, you can achieve beautiful, rich effects according to your unique style and taste.
We define the darkest shadows first and hatch in one layer, then the lighter ones as well. Preserve the white surface of the paper for highlights. If the tone is too dark in some parts, you can use a kneaded eraser to lighten that area of the drawing.
Final thoughts
Flowers of different colors and sizes are among the first things children start to depict in their drawings. They are among the most popular subjects in visual arts, inspiring many artists throughout art history.
The step-by-step tutorial described above contains all the information you need about drawing a magnolia flower. Following these three steps, you will be able to draw any plant and much more besides magnolia flowers.
Anyone can learn to draw by practicing and mastering the fundamentals of drawing.

Debora
My name is Debora, and I’m the founder of Drawing Fundamentals. I work as a civil engineering technician. I acquired the basic knowledge necessary for freehand and technical drawing during my school training, further developing and perfecting these skills throughout my years in the profession. Through my blog, I aim to assist anyone interested in learning to draw.