Novice artists often wonder why is it so difficult to depict hands. With this article, I want to help you better understand this important topic.
For many novice artists, it is hard to draw hands because they are a very complex part of the human body.
Hands are capable of an amazing variety of movements and actions that are challenging to portray.

To master the drawing of human hands, we need to learn their proportions.

Knowledge of anatomy, which includes bones, muscles, tendons, joints, and their function, is also important for a realistic representation of hands.

Hands in different, often difficult poses can only be realistically presented using the principles of perspective, especially foreshortening.

Another challenge is depicting the aging of the hands.
After mastering the things listed above, you will be able to successfully draw hands based on live models or your imagination.
The drawing of hands has been a popular subject since the beginning of art history. The depiction of hands has already been practiced by Paleolithic people, as evidenced by numerous cave paintings around the world.
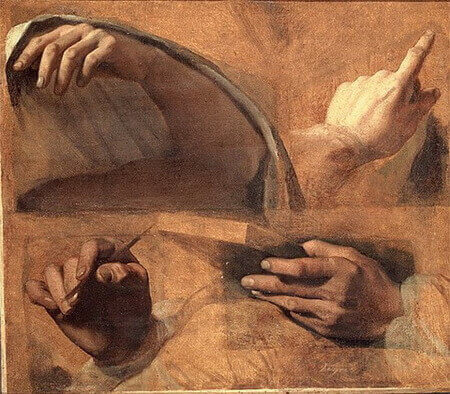
We use our hands as versatile instruments for various activities such as our hobbies or work. The hand is also an expressive tool, we often use its gestures to communicate our thoughts and emotions. There are many examples of the expressive depiction of hands in the works of famous Renaissance masters.
Draw studies of hands in different poses while performing a wide variety of movements and gestures. The easiest model to access is your own hand, which you can study and draw at any time.
Proportions of the human hand
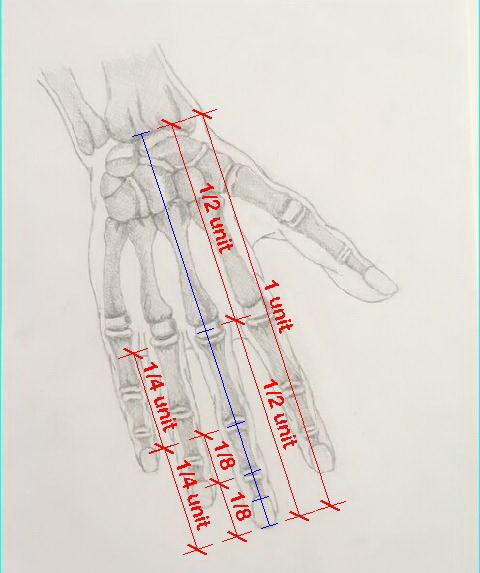
There are accepted, general proportions that can be applied to most people’s hands when drawing.
- The length of the middle finger is equal to the length of the palm.
- The first phalange is half the full length of the finger.
- The middle and distal phalanges are half the size of the proximal phalange.
- Dividing the distal phalange in half, we get the length of the fingernail.
- The index finger and the ring finger are in most cases the same length and reach to the nail bed of the middle finger.
There are also differences that we need to observe for each model and adjust the drawing accordingly.
Regarding the proportions of the hand, we must also mention the proportions between the hand and other parts of the body. This information is useful when drawing the entire human figure. For example, the length of the hand is the same as the length of the face from the bottom of the chin to the hairline.
In his notes, Leonardo da Vinci wrote about the proportions between the hands and other body parts:
“From the tip of the longest finger of the hand to the shoulder joint is four hands
or, if you will, four faces.”
“The hand from the longest finger to the wrist joint goes 4 times from the tip of
the longest finger to the shoulder joint.”
“The palm of the hand without the fingers goes twice into the length of the foot
without the toes.
If you hold your hand with the fingers straight out and close together you will
find it to be of the same width as the widest part of the foot, that is where it is
joined onto the toes.
And if you measure from the prominence of the inner ankle to the end of the
great toe you will find this measure to be as long as the whole hand.”
Anatomy of the hands
Unlike medical anatomy, artistic anatomy does not deal with the study of all organs. We only need to know the parts that, by their shape and movement, affect the appearance of the surface shape of the body. In the case of the hands, we need to know the structure and shape of the bones, muscles, and joints. Some of the blood vessels are also visible through the skin.
The bones of the hands
The skeletal system forms the solid framework of the body. The individual bones are connected to each other and in most cases are moved by the muscles.
The hand is attached to the lower arm at the wrist. The lower arm consists of two bones, the Ulna and the Radius. The hand is made up of smaller bones, which makes it agile.
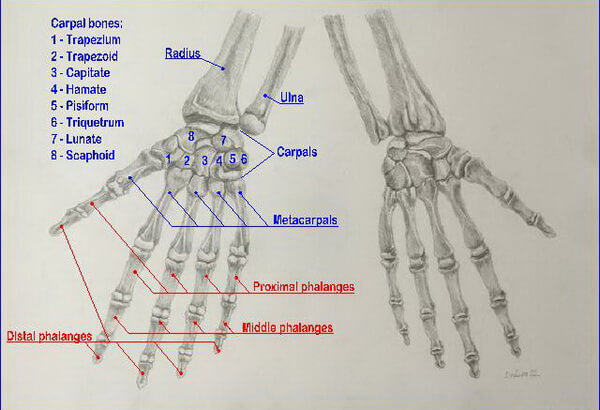
The skeletal system of the hand consists of three parts, the carpals, metacarpals, and phalanges.
The carpals (wrist bones) have 8 bones arranged in two rows as a continuation of the lower arm. Metacarpals consist of 5 bones that grow larger from the little finger to the index finger. The one at the thumb is different from the other four.
There are a total of 14 phalanges, each finger has three, except for the thumb, which has two. In addition, there are two small bones in the thumb that are called sesamoid bones.
Joints of the hands
The joints connect the bones into a single system. The joints of the hand are attached to the wrists.
The joint connections between the bones are movable or immovable. The thumb can be moved, bent, and rotated more than other fingers.
The mobility of phalanges also varies. The first phalanges of the fingers allow movement and rotation, while the movements of the other two phalanges are more limited. The two phalanges of the thumb are also restricted in movement.
Muscles and tendons of the hands
The muscles of the forearm are attached to the hand and fingers by tendons responsible for their movement.
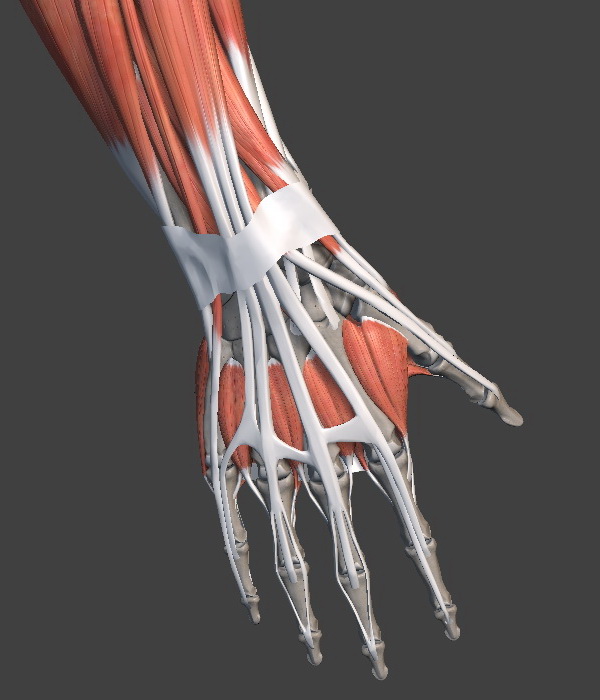
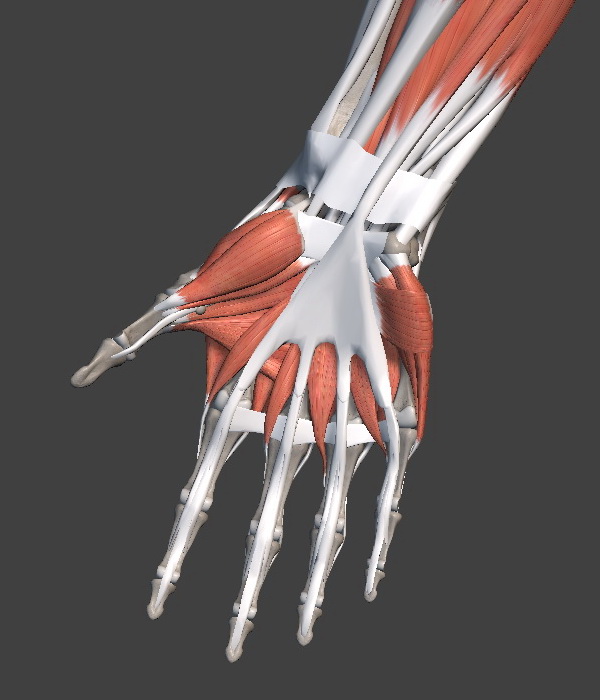
The movement of the hand is mostly done by the muscles in the forearm, but there are also smaller muscles in the hand.
The flexor muscles are located in the anterior forearm and continue in the direction of the hand. These muscles bend the wrist and allow the hand to close and grip.
The extensors are located at the posterior forearm. These muscles allow the wrist to bend backward as well as the hand to open and stretch.
The muscles of the hand move the fingers and thumb. They are divided into three groups: the muscles that attach to the thumb, the muscles that are located at the little finger, and the muscle group in the middle that fills the area between the metacarpals.
There are no muscles on the fingers, only fatty tissue.
Blood vessels of the hands
Although the blood vessels are visible on the surface of the hand, it is sufficient to deal with them only by observing them in life, on the models to be drawn.
Applying perspective to drawing hands
In order to represent the hands realistically and to create the effect of a three-dimensional object, we need to learn to apply the principles of perspective. Knowing and applying perspective will help your drawing not look flat.
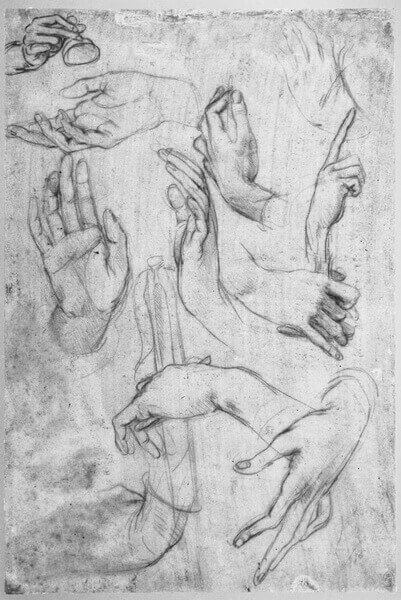
Foreshortening
If we observe our hands straight in front, all parts are visible in their actual size. When, on the other hand, we turn our hands or bend our fingers, some parts appear compressed and foreshortened.
Overlapping
The parts that are in the foreground, closer to the viewer, partially cover the elements in the back. This allows you to visualize the depth of space in your drawing.
Tonal rendering
By using tonal rendering, you can create the illusion of spatiality in your drawing. The depiction of light, shade, and shadow will make the drawn hands appear three-dimensional.
Tonal rendering should be done taking into account the shapes of the hands. Follow the shapes and curves with your shading.
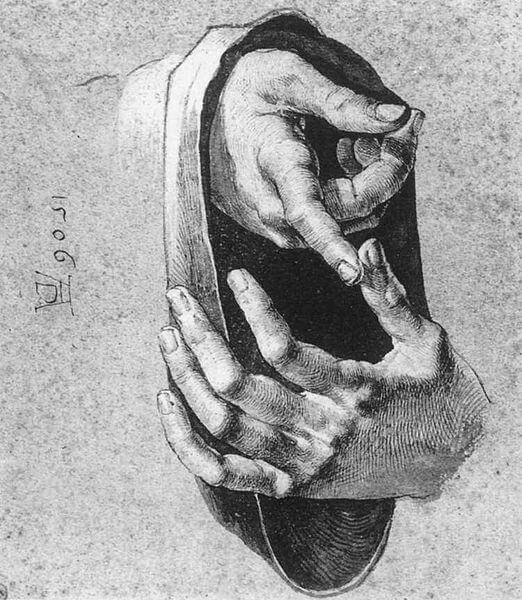
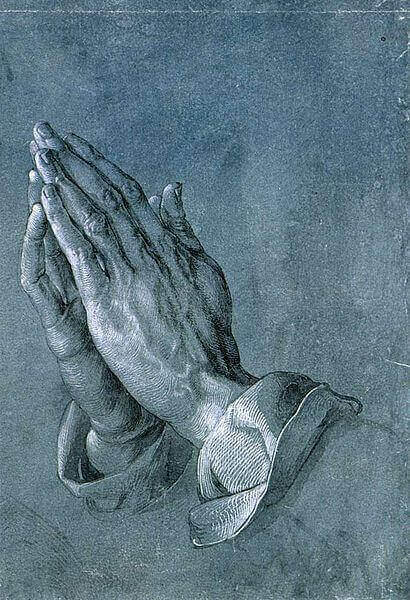
Albrecht Dürer’s study below is an excellent example of overlapping, foreshortening, and tonal rendering applied to the drawing of hands.
Start your drawing with the larger shapes
Start by simplifying the shapes of the hands into larger blocks and masses. This will make it easier to draw them. In the next step, move from the large shapes to the smaller details.
Aging of the hands
Our hands change throughout our lives, from birth to old age. The texture of the skin changes, but so do the muscles and joints, and this affects the shape of our hands.
Representation of hands in art history
The human hand is a recurring motif in rock art from around the world. They are present in the Americas, Europe, Australia, and Asia. Some of them are 30,000 years old. You can view these beautiful works of art on the website of the Bradshaw Foundation.
In the Middle Ages, little emphasis was placed on the representation of the human body. During the Renaissance, there was a renewed need for art to depict the human body in a realistic way.
The best-known artists of the Renaissance, including Leonardo da Vinci, Michelangelo Buonarroti, and Albrecht Dürer, have studied human anatomy in depth. It was clear to them that the layers under the skin had an effect on the appearance of the body surface.
I encourage you to study the drawings and techniques of the great masters and learn from the greatest artists. Feel free to make copies of the drawings of the old masters for practice.
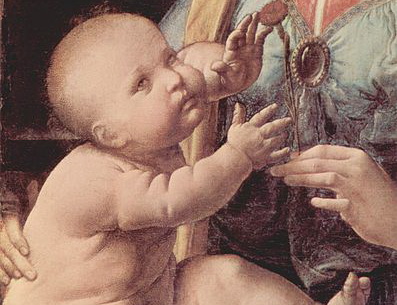
Leonardo da Vinci’s drawings left to posterity show a keen interest in human anatomy. In addition to the hands of women and men, we can also observe the hands of babies in his drawings and paintings.
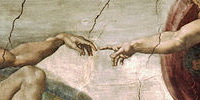
One of the best-known representations of hands can be seen in Michelangelo Buonarroti’s fresco depicting the creation of Adam.
Albrecht Dürer, a Renaissance artist of German descent, also dealt extensively with the proportions of the human body, developing his own canon. Among his drawings, we find several hand studies. The Study of an Apostle’s Hands (Praying Hands) is probably the best known.
Final thoughts
Drawing the hand poses a challenge to novice artists, as it is perhaps the most complex part of the human body.
To be successful in drawing hands, we need to learn their proportions and anatomy, as well as the principles of perspective. Although drawing hands seems difficult at first, it can be learned with proper instruction and practice.

Debora
My name is Debora, and I’m the founder of Drawing Fundamentals. I work as a civil engineering technician. I acquired the basic knowledge necessary for freehand and technical drawing during my school training, further developing and perfecting these skills throughout my years in the profession. Through my blog, I aim to assist anyone interested in learning to draw.

