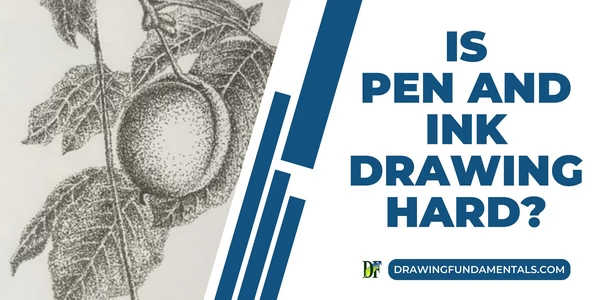
Pen and ink are the perfect tools for making precise, detailed drawings. It’s a popular technique among artists because it can display a wide variety of subjects.
If you’re new to this medium or drawing altogether, you might be wondering if it’s difficult to learn to express yourself through pen and ink drawings. Let me shed some light on the subject.
Pen and ink drawing may seem hard at the beginning of the learning process.
The difficulty with this medium is that ink can't be erased and therefore it's difficult to correct mistakes.
Therefore, you need to work with ink much more thoughtfully than with a pencil. In addition, pen control requires properly developed eye-hand coordination.
The good news is that you can easily overcome these initial difficulties with proper training and practice.
For a well-composed ink and pen drawing, you need to know the basics of drawing. These include, for example, the linear and atmospheric perspective, the effects of light and shadow, and the principles of artistic composition.
The pen and ink technique is perfect for displaying various subjects such as human figures, portraits, nature, landscapes, and still-life compositions.
Drawing with a pen requires some skills and dexterity everyone can acquire. This post aims to help anyone interested in learning Pen and ink drawing techniques.
What do you need to draw with ink?
You’ll need some basic, widely available tools and materials for drawing with pen and ink.
What pen do artists use?
The pens most commonly used by artists include classic dip pens and technical pens.
What are dip pens good for?
There are several types and sizes of nibs. A nib with a sharp point produces thinner lines. Nibs with round tips can be used to draw thicker lines or dots.
These metal nibs are placed in a pen handle before use. Wash the nib with warm water after each use.
The advantage of a dip pen is that it‘s available at a low cost, and the disadvantage is that it can hold little ink, so you often need to re-dip it.
What are technical pens?
Technical pens are my favorites because I can draw beautifully with them. If you take care of them and maintain them well, they will work perfectly for many years to come. I‘ve used the Staedtler pens in the image below for over 30 years.
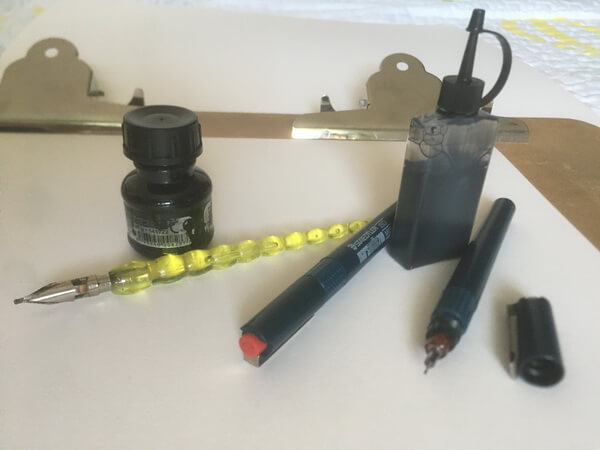
Technical pens are manufactured in several thicknesses. The 0.13 mm pen is the thinnest and the thickest is 2.0 mm. I use the 0.5mm pen for most of my drawings.
Their advantage is that we can draw lines of uniform thickness with them and no ink leaks from them. They have a refillable ink tank, so you don’t have to re-dip them after a few pen strokes. The disadvantage of technical pens is that high-quality ones are more expensive than simple dip pens. In addition, they require special ink and careful maintenance.
If you don’t plan to use the technical pen for an extended period, it should be washed with water and dried before you store it. Otherwise, the ink will dry out and the pen may be permanently damaged.
Graphite pencils
Since ink-drawn elements cannot be erased, it may be useful to make a preliminary pencil drawing. You can use a pencil with a hardness of 2H to 2B for this. Pencils marked H are hard and that marked B is soft.
For later removal of the preliminary graphite drawing, a kneadable eraser is the best choice as it’s gentle and doesn’t damage the surface of the paper.
Watercolor brushes
If you want to apply ink to your drawing on a larger surface, you can do it efficiently with a brush. Diluted ink or watercolor wash can also be applied to the drawing sheet with a soft brush.
Drawing ink
Quality inks, such as traditional black Indian ink are permanent and don’t fade over time. In previous historical ages, inks were black, brown, or gray. Today they are produced in many different colors. Colored inks may fade over time because the pigments they contain are not permanent.
If you decide to use ink or watercolor washes in combination with ink lines or stippling, I recommend using waterproof ink.
Special inks must be used for technical pens, as simple inks can clog them.
Paper for pen and ink drawing
The quality of the paper will affect the final result of your drawing. You can use simple copy paper for learning, practicing, and quick sketches, but for more serious works of art, a good quality paper weighing at least 100g/m² is a good choice.
You can use watercolor paper if you’d like to apply washes to your ink drawing with water-diluted ink or watercolors.
For pen and ink techniques that consist of lines and dots, the best choice is a smooth, fine-tooth surface paper, as the nib can scratch the surface of a rough-textured paper.
Drawing board
To draw with pen and ink, set the drawing board to an approximately horizontal position. The board should have a smooth surface. Attach the drawing sheet to the board with masking tape or clips.
Sketchbook
A sketchbook can come in handy as it’s portable. You can take it anywhere with you and use it for sketching urban scenes, landscapes, or nature for later reference.
Preliminary pencil sketch
Since drawing ink can’t be erased, it’s a good idea to start the drawing with a preliminary pencil sketch, which you will then redraw with ink. Some pen and ink artists think the preliminary graphite drawing is cheating, but I think it’s essential for beginners to do precise work.
You can easily work with pen and ink over the faint pencil marks. When you no longer need the pencil drawing, you can erase it. A kneadable eraser is best for this, as it gently erases and doesn’t damage the drawing surface.
Try to make the pencil sketch accurately because you won’t be able to improve much on it during the ink drawing phase. Be careful not to press hard on the pencil so that the sketch lines are faint and the pencil marks aren’t etched into the paper.
It’s also a good solution to first make the sketch on a simple drawing paper and then transfer it to the paper on which you’ll be working with pen and ink.
How do you start drawing with a pen?
A pen and ink drawing is made up of various elements of the visual language, such as lines, dots, and toned or hatched surfaces.
If you use a dip pen, the thickness of your line is affected by how much you press the pen onto the paper. Technical pens always draw lines of uniform thickness.
Hold the dip pen at 45 degrees to the paper and vary the pressure you apply to it. Keep the technical pens in an almost vertical position when drawing and don’t press them onto the paper.
Pen And Ink Drawing Techniques
Hatching and crosshatching
You can use pen and ink hatching to shade your drawing. Hatching consists of parallel lines running vertically, horizontally, or diagonally, which can be applied in one or more layers.
Different types of lines, such as dashed or wavy lines, and zigzag, or curved lines, can also produce interesting textures.
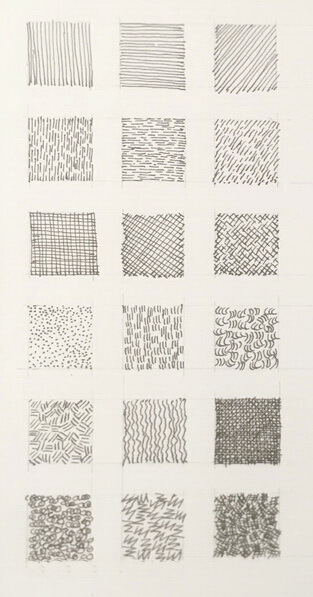
Crosshatching consists of two or more layers of lines that may be perpendicular to each other but may also enclose other angles. The more layers you apply, the denser and darker the tone will be.
Choose from different types of hatching and crosshatching depending on what effect you want to achieve. You can create a variety of effects by changing and combining the direction and length of the lines.
When hatching, it’s important to consider the shape and surface texture of the object you want to represent. The best way to hatch is to follow the shape and contours of the object, especially when it comes to round or curved objects.
By shading the drawing, you can emphasize the spatiality of the objects depicted and make them look three-dimensional.
Stippling
The stippling technique involves drawing dots of different sizes at different densities. Apply it alone or in combination with other methods. With stippling, you can create subtle transitions between tones.

Stipple more densely placed dots for darker tones and fewer dots farther apart for lighter tones.
Ink and watercolor washes
The tones you can achieve with ink or watercolor washes depend on how much water you add for dilution. The quality of the tones is also affected by how much the brush is loaded with ink or watercolor.
You can use watercolor or diluted ink wash to pre-tint or make an underpainting on the paper before drawing. In this case, the best solution is to draw the preliminary sketch on another piece of paper, then transfer it to the toned paper. This way you can avoid using the eraser too much as it can damage the toned surface.
You can also choose to apply an ink or watercolor wash after you have finished drawing with a pen and erased traces of the preliminary graphite drawing.
Both solutions are equally good, depending on what effect you aim to achieve.
How do you get better at drawing with a pen?
An important step in drawing successfully with pen and ink is to practice the various techniques described above until you can apply them skillfully.
By studying the works and techniques of the great masters of the fine arts, you can gain valuable information and learn a lot by copying their works. Copying the works of old masters will benefit the development of your style and influence your artwork in a good way.
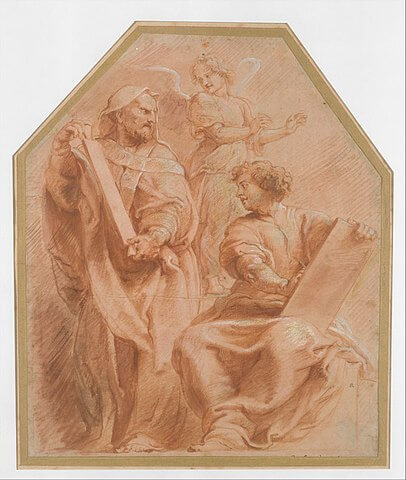
Leonardo da Vinci himself mentions copying the works of the great masters in his notes, among the exercises he recommends for beginners. Great artists such as Michelangelo, Rubens, and Rembrandt have also copied works from previous eras.
Famous pen and ink drawings in art history
During the Renaissance, Michelangelo Buonarroti and Leonardo da Vinci also made pen and ink drawings.
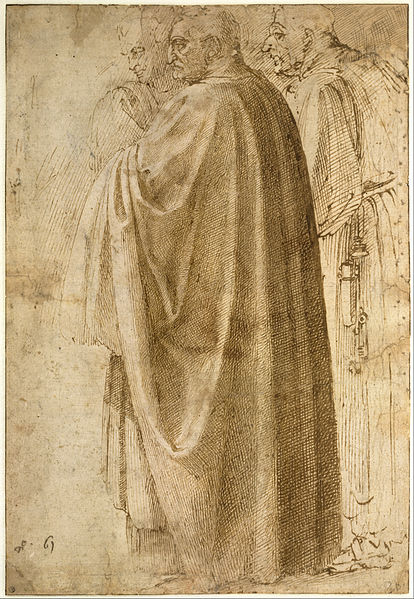
At that time, ink drawings were not seen as independent works of art, but as sketches. In the Baroque period, Flemish painters Peter Paul Rubens and Rembrandt van Rijn also worked with pen and ink.
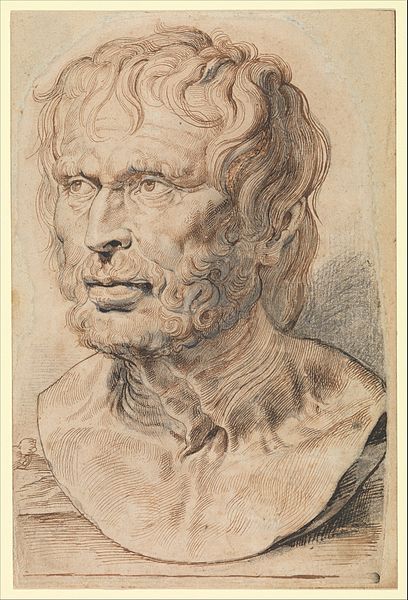
Eugène Delacroix, Vincent van Gogh, and Pablo Picasso also used the pen and ink technique to create their works of art.
More famous pen and ink artwork can be found on the website of The Metropolitan Museum of Art.
Final thoughts
Pen and ink are simple and inexpensive art mediums, yet there are many ways you can express yourself through them.
Once you are familiar with the basic techniques of pen and ink drawing, practice them persistently. With time and practice, you’ll be able to develop a unique style and convey your message, impressions, and feelings to the viewers of your artwork.
Debora
My name is Debora, and I’m the founder of Drawing Fundamentals. I work as a civil engineering technician. I acquired the basic knowledge necessary for freehand and technical drawing during my school training, further developing and perfecting these skills throughout my years in the profession. Through my blog, I aim to assist anyone interested in learning to draw.

